
Note
Click here to download the full example code
Compile MXNet Models
Author: Joshua Z. Zhang, Kazutaka Morita
This article is an introductory tutorial to deploy mxnet models with Relay.
For us to begin with, mxnet module is required to be installed.
A quick solution is
pip install mxnet --user
or please refer to official installation guide. https://mxnet.apache.org/versions/master/install/index.html
# some standard imports
import mxnet as mx
import tvm
import tvm.relay as relay
import numpy as np
Download Resnet18 model from Gluon Model Zoo
In this section, we download a pretrained imagenet model and classify an image.
from tvm.contrib.download import download_testdata
from mxnet.gluon.model_zoo.vision import get_model
from PIL import Image
from matplotlib import pyplot as plt
block = get_model("resnet18_v1", pretrained=True)
img_url = "https://github.com/dmlc/mxnet.js/blob/main/data/cat.png?raw=true"
img_name = "cat.png"
synset_url = "".join(
[
"https://gist.githubusercontent.com/zhreshold/",
"4d0b62f3d01426887599d4f7ede23ee5/raw/",
"596b27d23537e5a1b5751d2b0481ef172f58b539/",
"imagenet1000_clsid_to_human.txt",
]
)
synset_name = "imagenet1000_clsid_to_human.txt"
img_path = download_testdata(img_url, "cat.png", module="data")
synset_path = download_testdata(synset_url, synset_name, module="data")
with open(synset_path) as f:
synset = eval(f.read())
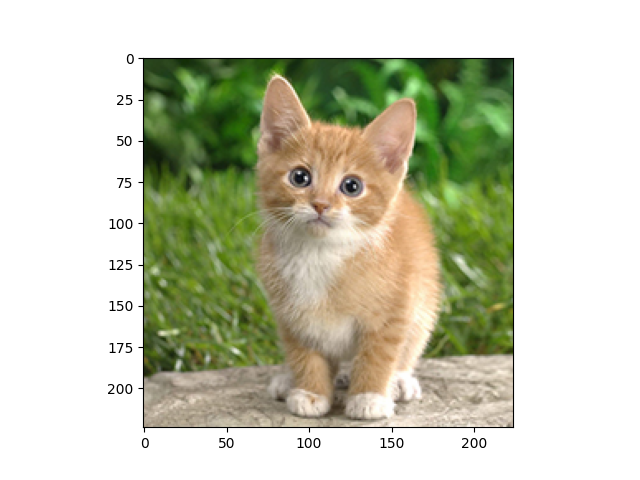
image = Image.open(img_path).resize((224, 224))
plt.imshow(image)
plt.show()
def transform_image(image):
image = np.array(image) - np.array([123.0, 117.0, 104.0])
image /= np.array([58.395, 57.12, 57.375])
image = image.transpose((2, 0, 1))
image = image[np.newaxis, :]
return image
x = transform_image(image)
print("x", x.shape)
Downloading /workspace/.mxnet/models/resnet18_v1-a0666292.zip54345e74-5df7-4105-a583-9818861bf956 from https://apache-mxnet.s3-accelerate.dualstack.amazonaws.com/gluon/models/resnet18_v1-a0666292.zip...
x (1, 3, 224, 224)
Compile the Graph
Now we would like to port the Gluon model to a portable computational graph. It’s as easy as several lines. We support MXNet static graph(symbol) and HybridBlock in mxnet.gluon
shape_dict = {"data": x.shape}
mod, params = relay.frontend.from_mxnet(block, shape_dict)
## we want a probability so add a softmax operator
func = mod["main"]
func = relay.Function(func.params, relay.nn.softmax(func.body), None, func.type_params, func.attrs)
now compile the graph
target = "cuda"
with tvm.transform.PassContext(opt_level=3):
    lib = relay.build(func, target, params=params)
Execute the portable graph on TVM
Now, we would like to reproduce the same forward computation using TVM.
from tvm.contrib import graph_executor

dev = tvm.cuda(0)
dtype = "float32"
m = graph_executor.GraphModule(lib["default"](dev))
# set inputs
m.set_input("data", tvm.nd.array(x.astype(dtype)))
# execute
m.run()
# get outputs
tvm_output = m.get_output(0)
top1 = np.argmax(tvm_output.numpy()[0])
print("TVM prediction top-1:", top1, synset[top1])
TVM prediction top-1: 282 tiger cat
Use MXNet symbol with pretrained weights
MXNet often use arg_params and aux_params to store network parameters separately, here we show how to use these weights with existing API
def block2symbol(block):
    data = mx.sym.Variable("data")
    sym = block(data)
    args = {}
    auxs = {}
    for k, v in block.collect_params().items():
        args[k] = mx.nd.array(v.data().asnumpy())
    return sym, args, auxs


mx_sym, args, auxs = block2symbol(block)
# usually we would save/load it as checkpoint
mx.model.save_checkpoint("resnet18_v1", 0, mx_sym, args, auxs)
# there are 'resnet18_v1-0000.params' and 'resnet18_v1-symbol.json' on disk
for a normal mxnet model, we start from here
mx_sym, args, auxs = mx.model.load_checkpoint("resnet18_v1", 0)
# now we use the same API to get Relay computation graph
mod, relay_params = relay.frontend.from_mxnet(mx_sym, shape_dict, arg_params=args, aux_params=auxs)
# repeat the same steps to run this model using TVM